It took me long enough to find the perfect pumpkin to make a Fru Fru Pumpkin for my house, but I finally saw it in a bin at the grocery store. Huge fat pumpkins, so cute and so cheap! I fished around until I found the cutest of the "patch" and here it is.
I used the same materials as the pumpkin for my office (see it here) but added the cream lace. I love the combo of burlap and lace, raffia and leaves, the blues and oranges - I LOVE AUTUMN! And so there you have it. My fru fru pumpkin for the year. I regret I didn't do this on a fake pumpkin to have it for several years because I do love this combo of materials. *sigh*
Sooooo... what are you doing to decorate for Autumn?? Wanna share? I'd love to see!
Showing posts with label autumn. Show all posts
Tuesday, September 23, 2014
Wednesday, August 27, 2014
The 2014 Fru Fru Pumpkin Reveal!
Each year, I make a "Fru Fru" pumpkin for the office and when it's time to send it on its way, I undecorate it and toss it into the back of the flower bed. Finally, it took root and came back this year! So exciting!
Let me catch you up on the progression of this pumpkin - the plant (which for the longest time we had NO idea what was growing in this flower bed), then the pumpkin started showing up but was dangling outside of the flower bed!! We moved it into the bed and it really ripened quickly. The bottom two pics were taken with 24 hours of each other.
So back to the fru fru pumpkin - I hit Hobby Lobby last night (man, I love that store) and picked out what I wanted to do this year. And I'm in love with it. It cost considerably more than the dollar store finds I usually use in making these pumpkins, but it was SO WORTH IT when you see the difference. (By the way, I did a post earlier all about making Fru Fru Pumpkins, feel free to check it out for other ideas!)
TA DA!! I love the chevron and the blue/orange/burgundy combo. The rustic colors and burlap just bring the look up a few notches compared to the dollar store glitter ribbon I've been using.
This is last year's pumpkin with all items coming from the dollar store. So this in total (not including the hot glue and stick pins) cost about $8-9 and will last several months. It will carry you through the entire fall season.
I also did one a little tamer last year, still using dollar store items. I bought a dish towel at the dollar store and ripped it into strips, fraying the edges for a more rustic look. The fabric was too floppy on its on, so I used wide packaging tape along the back of one strip to form the bow shape. I really liked this one, too.
For today, I'm enjoying our new pumpkin in blue. :) AND I have enough decor left over to do another one for my house and I can't WAIT! We even have another pumpkin in our flower bed, so I may get two pumpkins for free! :) If so, I'll show you how that one turns out, too.
Ya'll have a lovely hump day! Thanks for joining me in my crazy fru fru pumpkin excitement!
Wednesday, September 18, 2013
{Tutorial} Autumnal Goodness - The Fru Fru Pumpkin
Ya'll, I'm am SO READY for some Fall Weather. I wore my pumpkin colored top today with some brown pants and the required gold sequined flip flops to celebrate cooler temperatures this morning. I want soup & cornbread, chocolate chip pancakes with peanut butter and ... now that I'm thinking about it, I'm going home and diving into some hash and rice tonight. Oh my gosh, I love fall.
Anyway, all this to share with you these Fru Fru pumpkins that I dearly adore. Cuteness and fall combined, how can you not fall in love?? Exactly, that's what I'm saying. Let me admit to something: I totally am cutting and pasting this from my other blog, but you can still enjoy it the same here at Pressed Clovers. So go buy you a pumpkin, gather your supplies and get to gettin'!
Welcome to Autumnal Goodness. This is the easiest and most fun project that makes a big wow ...Fru Fru Pumpkins! Everything you see here, minus the pumpkin, came from the dollar store, so this project is great on the budget, too. What do you need? Depends on your nature.
I suggest any of the following:
Ribbon
Fake leaves in various colors and shapes
Lots of straight pins
Sequins if you are oh-la-la
Picks, meaning little sprigs of autumnal stuff, berries, leaves, sticks, etc
Curling ribbon
What to do now. You have a pumpkin (the one in the top picture came from Wal-Mart and was definitely NOT perfect, but who cares? I was covering it up anyway!) Then decide if you want the ribbon to go all the way around (see the pic above) or only partial hanging down the sides, whatever! Or do you even want ribbon? Anyway, use the straight pins to fix the ribbon at the top of the pumpkin and either on the bottom or on the side - wherever your ribbon stops.
The fake leaves can be added, not added, massive or sparse - it's all your taste. The first picture, I went crazy with leaves. The one just above and below - not so much. The top picture is from this year and is sitting in my office. These two (above/below) are from my sister's rehearsal dinner at her wedding. More elegant and less tacky. :)
Mom added sprigs of sticks, berry picks, etc to give some height around the stem. Or sometimes a little bow. Everyone loved the pumpkin centerpieces and they were really inexpensive. We had a great time decorating them and gave them away to key people from the wedding. They loved them.
Just so you can see the overall picture of Katie's rehearsal dinner - it was held outside in a covered picnic area with one wall of stones making a huge fireplace. The white lights twinkled enough with the fireplace to light up the entire area just perfectly. Brown plastic table clothes and the pumpkin centerpieces were just awesome! :)
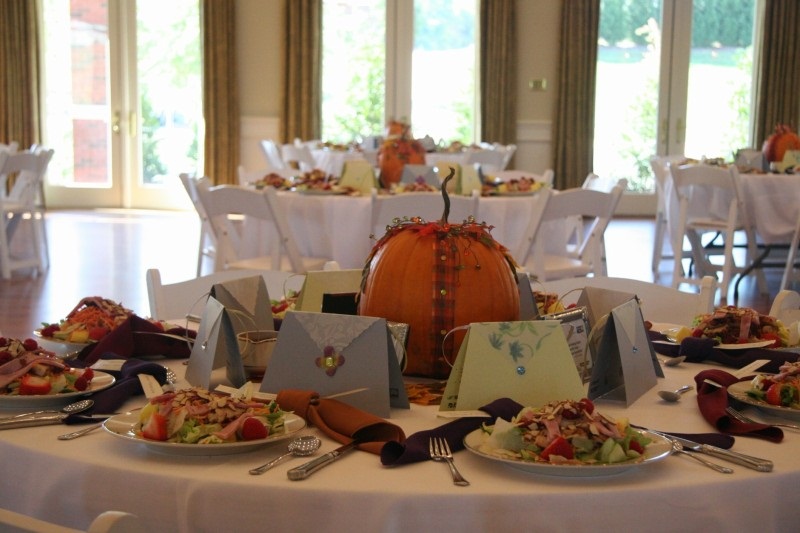
So where did this pumpkin mania begin? At my old job, we were planning a fru fru ladies luncheon with an autumnal theme - WHA-LA! Awesome pumpkin centerpieces! And, of course, at each table one of the agendas had THE DOT - you know, the special dot that means you are a WINNER! So someone received the centerpiece as a present, which the ladies loved!
Since this was a tad bit fru fru, we needed to bring out the bling with sequins, feathers and rhinestones. Sometimes, you just have to pull out the big guns: the hot glue gun that is. Straight pins just won't do it with the rhinestones so ladies, grab the gun and glue away!
Anyway, all this to share with you these Fru Fru pumpkins that I dearly adore. Cuteness and fall combined, how can you not fall in love?? Exactly, that's what I'm saying. Let me admit to something: I totally am cutting and pasting this from my other blog, but you can still enjoy it the same here at Pressed Clovers. So go buy you a pumpkin, gather your supplies and get to gettin'!
-- The Fru Fru Pumpkin --
I suggest any of the following:
Ribbon
Fake leaves in various colors and shapes
Lots of straight pins
Sequins if you are oh-la-la
Picks, meaning little sprigs of autumnal stuff, berries, leaves, sticks, etc
Curling ribbon
What to do now. You have a pumpkin (the one in the top picture came from Wal-Mart and was definitely NOT perfect, but who cares? I was covering it up anyway!) Then decide if you want the ribbon to go all the way around (see the pic above) or only partial hanging down the sides, whatever! Or do you even want ribbon? Anyway, use the straight pins to fix the ribbon at the top of the pumpkin and either on the bottom or on the side - wherever your ribbon stops.
The fake leaves can be added, not added, massive or sparse - it's all your taste. The first picture, I went crazy with leaves. The one just above and below - not so much. The top picture is from this year and is sitting in my office. These two (above/below) are from my sister's rehearsal dinner at her wedding. More elegant and less tacky. :)
Mom added sprigs of sticks, berry picks, etc to give some height around the stem. Or sometimes a little bow. Everyone loved the pumpkin centerpieces and they were really inexpensive. We had a great time decorating them and gave them away to key people from the wedding. They loved them.
Just so you can see the overall picture of Katie's rehearsal dinner - it was held outside in a covered picnic area with one wall of stones making a huge fireplace. The white lights twinkled enough with the fireplace to light up the entire area just perfectly. Brown plastic table clothes and the pumpkin centerpieces were just awesome! :)
Since this was a tad bit fru fru, we needed to bring out the bling with sequins, feathers and rhinestones. Sometimes, you just have to pull out the big guns: the hot glue gun that is. Straight pins just won't do it with the rhinestones so ladies, grab the gun and glue away!
Awesome results, no matter how you do it. So run out and buy your pumpkin, then look around your yard and house for the trimmings and have fun! I promise you there will be a WOW factor that tickles you pink. :)
Subscribe to:
Posts (Atom)